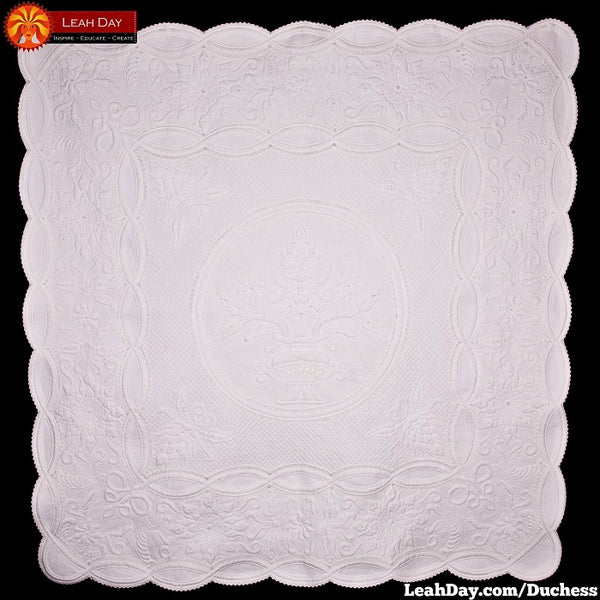
The Duchess Wholecloth Quilt
Finished Size - 65 x 64 inches
Completed February 2009
 |
Would you love to read the inspirational quilting stories behind all of Leah's goddess quilts? In 2019 Leah published her artist memoir showcasing the creation of each quilt in the goddess series. This is a story of transformation and how each goddess quilt pushed Leah to become a better woman, wife, mother, and quilter. This is the book quilters have been asking about for years! |
This quilt only took a couple months to quilt, but a few more months to finish completely as I decided to hand stitch thousands of beads, crystals, and yards of lace to the surface.
Creating a quilt like this really is a life-changing experience. Yes, it is difficult. Yes, there were days that I cried and tore my hair and wanted to quit! But by the time I got to the hand embellishing part of this quilt, I knew that I had created something very special and completely unique.
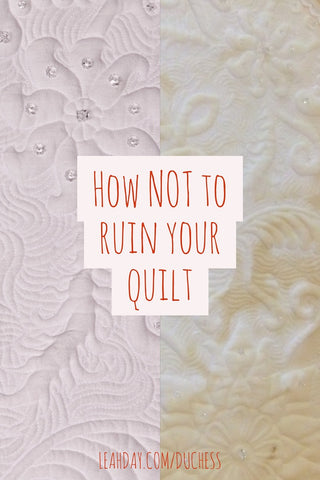 I learned so much from creating this quilt because I made so much while creating it. I experimented and tried new techniques, made several mistakes, and as you'll find, ended up ruining this quilt completely. Read on if you'd like to learn how NOT to ruin your quilts too!
#Affiliate - The inspiration for this quilt came from the movie The Duchess with Kiera Knightly (my favorite actress) and the biography The Duchess by Amanda Foreman.
Both the book and movie tell the story of Lady Georgiana Spencer, the Duchess of Devonshire, a beautiful woman in an unhappy arranged marriage. I have no idea why her story appealed to me, but the gorgeous images in the movie and over-the-top costumes probably had something to do with it!
Georgiana was a fashion icon of her time and personally invented the 3 foot stacked hairdo. She also became infamous for wearing ostrich feathers in her hair which so rare and so expensive that the Queen eventually banned them from court.
But for all her fame, wealth, and beauty, Georgiana was rarely happy. Her marriage was difficult and often on the rocks. She was a compulsive gambler and failed to produce her husband an heir for many long years, during which she suffered humiliation and gossip as he began an affair with her best friend.
During this quilt I would periodically film certain sections. I can't promise that the lighting was always good or that my hair was even combed, but at least you can see how this quilt came together just from simple muslin and polyester batting and eventually became a beautiful show winning quilt:
Creating The Duchess: a Wholecloth Quilt from Leah Day on Vimeo.
When I first saw the trailers for the movie The Duchess I was struck by the intensely beautiful and elaborate costuming. I soon found myself wanting to create something so elaborate, but instead of a dress, why not a quilt?
Having recently found Karen McTavish and her wonderful books Whitework Quilting and Mastering the Art of McTavishing, I knew how to create a wholecloth quilt using plastic quilting templates, but what about designing the quilt on paper? Could I draw this design at full size and then mark the quilt top?
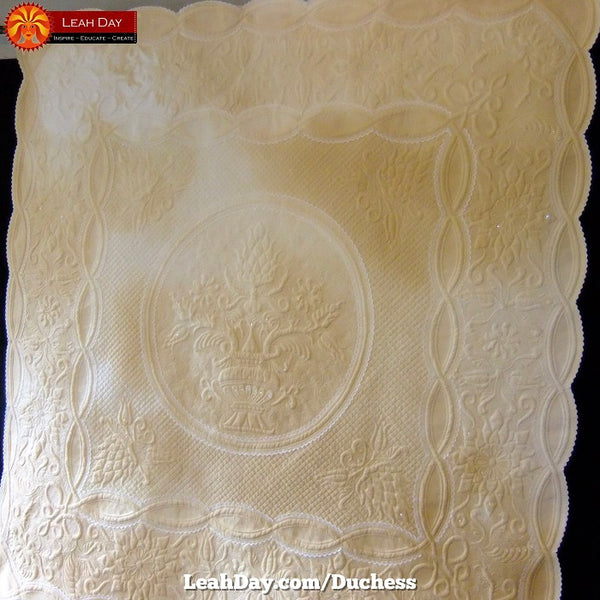
Using downloaded Georgian wall paper designs as inspiration, I first designed the center medallion on large graph paper, then taped together more sheets to complete 1/4 of the finished design. This was then transferred to the quilt using Fine Line Marking Pens.
 To make the motifs and designs stand out, I used trapunto, a technique for making certain areas of the quilt puffy. The quilt was then basted with only polyester batting (no backing) and each motif was outlined using Water Soluble Thread.
This special thread is used because you want this stitching to hold the batting in place temporarily, but wash away completely after the quilt is complete. The extra batting around each motif was then carefully clipped away, leaving extra batting only in the motifs - the areas that needed to be puffy.
Would you like to learn more about trapunto? Learn how to do this step-by-step in the Heart & Feather Wholecloth Workshop.
The Duchess was then basted a second time using more polyester batting and cotton backing and quilted very densely using 100% cotton Guterman 50 wt thread. During the quilting the thread broke constantly and was extremely frustrating.
I eventually switched machines from a Bernina Activa 240 to a Juki TL 98QE, but even still the thread breaks were a constant problem. It was only after quilting two more big quilt projects, that I would stumble across Isacord polyester embroidery thread and begin using this thinner, stronger polyester thread for quilting.
After it was quilted, the quilt was soaked in water, blocked into shape, then bound using bias binding around the curved edges. Now the quilt was pretty much finished and it was a beautiful wholecloth quilt.
Of course, no quilt is without issues and this was my very first white wholecloth quilt. I didn't realize it at the time, but I'd made a fatal error in marking the quilt top. In the middle of the night, in the middle of the marking process, I ran out of ink in my water soluble marking pen.
Rather than stop and go to the store in the morning for a new pen, I grabbed another marking pencil from a drawer and finished up the job. The mistake was that I forgot that I'd marked with that different pencil at the end of the quilting process. I dunked the quilt into a bath of warm water to remove the water soluble marks, and this heat set the pencil lines permanently.
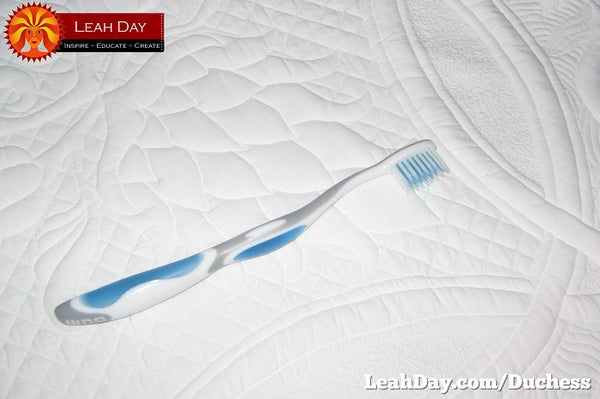
I tried to remove the marks many different ways. At one point I was scrubbing the mistakes with a toothbrush, trying to erase the faint lines of blue and pink in the background grid area of the quilt.
I can't tell you how frustrating it is to mark and create a huge quilt like this, only to realize that it's marred with an imperfection like this. It's very similar to feeling on top of the world, extremely happy and elated, and then crashing back down to earth again full of disappointment.
Rather than let this mistake ruin the entire quilt, I bound the edges then began looking for a way to cover or reduce the appearance of the blue marks, which were really only a problem over a small area.
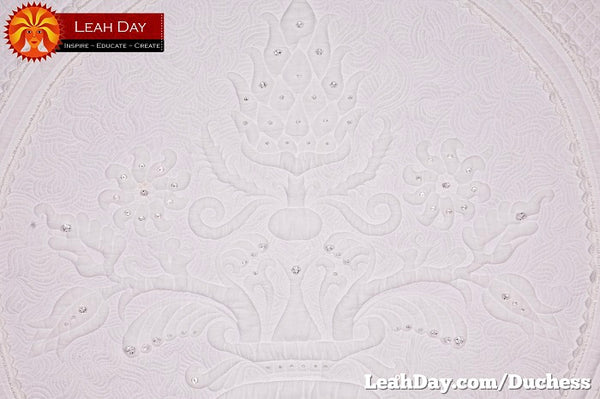
Unfortunately I decided to try a new material - hot fix crystals - and started applying them to the center of the quilt before properly testing the technique. Guess what happened? I ended up with scorch marks in the dead center of my beautiful quilt!

The burns were located in the center most loops of the vase. Never, ever test new materials or techniques on the actual quilt!
Mistake after mistake after mistake was made on The Duchess. It was a challenging experience that forced me to learn many things about quilting and understand what I could, and could not, get away with.
In an attempt to cover up the scorch mark, I tried many paints and inks, but nothing would cover up the brown marks. It was definitely frustrating, but this taught me an important lesson about testing materials before throwing them into a big project.
While the hot fix crystals were definitely out of the question, I still wanted to embellish the surface of this quilt with beads and lace. So the beading began! I first started adding a row of seed beads and lace along the center medallion. Then I felt like I had to put the same beads and lace on the other side of the border. Then I had to add it to both the inner and outer rope borders.
Are you catching the pattern here?
Before I started the inner rope border, I ran out of clear seed beads and lace and was wanting to work on it, not go shopping. Instead I started adding clear Swarovski crystals to the certain flowers and motifs in the center medallion.
Of course, then I thought, "If I've added crystals to the motifs in the center, I have to add them to the border motifs too!"
So then I ran out of crystals and was out of seed beads and lace, and was having trouble finding these items in stores. I ended up buying crystals on ebay, but they took 3 weeks to ship from Hong Kong.
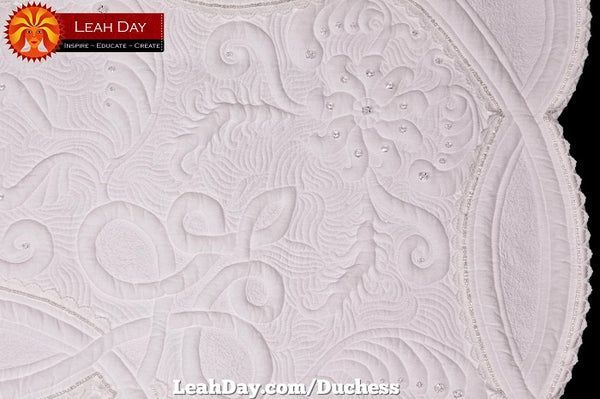
In the meantime, my son brought home a nasty cold from preschool so all I wanted to do was sit around and listen to audiobooks and stitch beads on this quilt. That's when I began stitching on an individual delica seed bead inside every single 1/2" square in the gridded space of the quilt.
I can only claim temporary insanity and heavy cold medication for this somehow sounding like a good idea at the time!
But even with how long they took to apply, I wouldn't have embellished this quilt any differently. The beads made this quilt in my opinion. They add a layer of elegance and beauty that pushes the quilt from beautiful to breathtaking.
Eventually all of the beads came in the mail or were found in local shops and each section was finished by working a little (or a lot) on it every day for 2 months. All told, applying the beads took another 100-150 hours, making the grand total of time on the quilt to be somewhere around 300 hours from start to finish, but in truth it's very hard to know exactly how much time was spent making it.
This quilt really was a journey for me. I started on this path in October with the idea and research, which spawned into a sort of obsession by November. Along this journey I learned about patience dealing with sections of the quilt that seemed to take FOREVER! I learned about perseverance and sticking with it, even when I sometimes wanted to throw the whole thing in the trash and forget about it.
I also learned how devastating mistakes can be, and the cost of rushing to use new techniques or materials without proper testing. The Duchess was finally completed in 2009 and, despite many mistakes and flaws, really was a gorgeous quilt.
The Duchess was shown three times at the following shows and won the following awards:
Denver National Quilt Festival IV - April 2009
Awarded Best Machine Workmanship Traditional
North Carolina Quilt Symposium - May 2009
Awarded 1st Place Large Wall Hanging Mixed / Other Techniques
National Quilting Association Show in Columbus Ohio - June 2009
Update: Spring 2012
It's been many years since The Duchess was completed and it's high time I tell the story of how this quilt was ruined.
Yes, the quilt had issues that I mentioned above: blue and pink chalk pencil lines that refused to come out and a scorch mark that could not be covered up, no matter how much paint I dumped on the surface.
Unfortunately I made the biggest mistake after this quilt was fully complete and competing in shows. From the normal wear and tear of showing, The Duchess started looking a bit dusty, so I asked around for advice for how I should clean it.
I was told by several different quilters to soak the quilt in oxyclean, or hydrogen peroxide, which many people said was the exact same thing as oxyclean.
So that's what I did - I soaked The Duchess in a 50-50 solution of hydrogen peroxide and water to clean and whiten the surface and hopefully remove those stubborn blue marks.
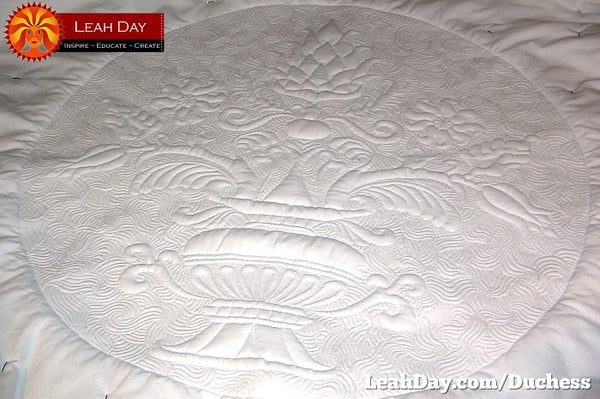
Unfortunately this worked in the opposite way. Instead of whitening the quilt, the hydrogen peroxide reacted with the fabric and the air and literally burned the surface of the quilt. By the third show, the peroxide had eaten through so much of the quilt that it was ripping and tearing in many places.
Just in case you ever hear that: Oxyclean and Hydrogen Peroxide are NOT the same thing!
But why did this quilt degrade so quickly? I believe part of the problem was the cotton fabric I used for the front and back of this quilt was backing fabric - lower quality cheap fabric that was already thinner and more delicate. The hydrogen peroxide weakens cotton fibers, which caused the fabric to tear.

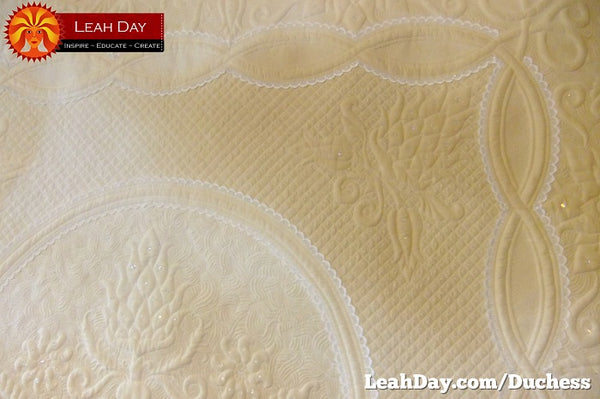
In the picture above, the white spots are holes in the border caused by the chemical burn of the hydrogen peroxide. The white batting is showing through these areas and the fabric feels very brittle to the touch.
The thread holding the beads in place was also cotton so the beads began falling off the quilt as well. Whenever I unroll and hang this quilt, at least 20 beads fall off the surface.
What is far worse than the beads falling off is the growing holes in this quilt. Every time I touch this quilt it rips somewhere, and there are areas where the fiber is so brittle it crumbles when you touch it. This is the nature of a chemical burn on fabric.
The surface itself looks antiqued and tea dyed. When I'd take this quilt with me for shows and lectures, my husband Josh would tell people that the quilt was made by my great-great-grandmother as a joke, and they would believe him!
The only benefit from the staining of the surface has been that photos are much easier to take now. You can actually see all the textures and designs now thanks to the chemical burn.
Words can't really describe how it feels to have a quilt like this ruined so completely. For several months, I tried living with The Duchess on my walls, but eventually had to take it down. It's just too depressing to look at all that work ruined by a handful of stupid mistakes.
This was a very frustrating experience. It made me so angry at myself many times I wanted to scream with rage. I almost stopped quilting thanks to this experience, mostly because it felt so crushing to put so much time and effort into a quilt, only to have it ruined.
But instead of letting this experience beat me, I decided to learn from the mistake and move on.
One thing that always bothered me about The Duchess after it was finished was the simple fact that it absolutely wasn't my style. This quilt would fit in great in a Victorian mansion with high vaulted ceilings and wood paneled walls. To say it straight - that isn't me!
So rather than continuing to stitch over the top, floral Georgian designs that weren't really my style, I changed gears and focused on creating goddess art quilts and hundreds of unique free motion quilting designs that have helped me build a business with quilting.
One day I may make The Duchess again, but it won't be a white quilt, and it definitely won't be covered with so many beads, lace, frills, and ornaments. It definitely won't be so delicate or easy to mess up, and I'll make it this time for me and redesign certain elements to better fit my style.
So the end of this story really is positive:
- Challenge yourself, but don't be surprised if you end up learning more than you bargained for.
- Mistakes happen and the best thing you can do is roll with the punches and do the best job you can.
- Sometimes losing something precious can teach you far more than if it stayed perfect forever.
- Finally, be true to yourself and be willing to run down whatever path you're most interested in. Had I not followed my love for The Duchess movie, this quilt would never have been made!
 |
If you died tomorrow, what would you most regret not doing? Do you have a dream achievement, a special project you long to focus on? Have you been putting off this dream for years? This beautiful 3-month daily planner includes undated blank calendars so you can fill in the spaces to fit any month of the year. |


