Making a quilted jacket is an awesome way to show off your quilting skills and create a warm, fashionable, functional garment that will last for years to come. I've created many quilted jackets over the years following this simple set of steps using a basic Simplicity jacket pattern.
This Kimono style jacket was created using Simplicity Pattern 5345.
For years I've wanted to have a closet full of quilted clothing. I've especially wanted a jacket I could wear to quilting events so that when people saw it, they would immediately know I was quilter and not some kid wandering around looking for her mother.
In 2009, using a simple Simplicity kimono pattern, I design my first quilted jacket with yin yang and leaf motifs. In 2010, I designed a second jacket with the same pattern, but this time with sun and feather motifs.
|
|
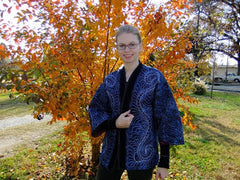 Blue Side of Sun and Feather Quilted Jacket |
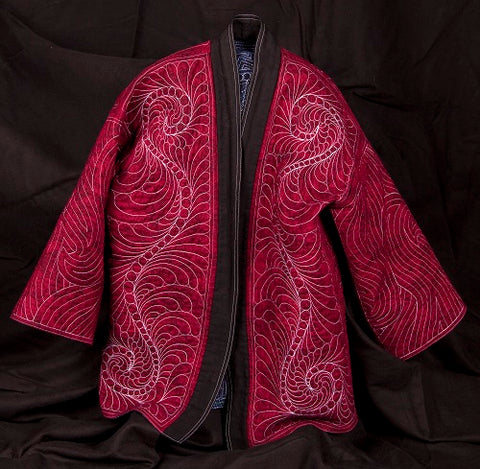
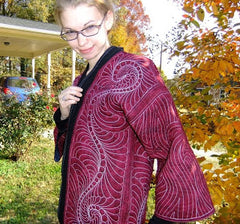 Red side of Sun and Feather Red side of Sun and Feather Quilted Jacket |

Both projects were finished by hand to create completely double sided jackets. I admittedly hadn't planned the colors of my first jacket well so it didn't appear great on the wrong side, but the second jacket was fully double sided with a red and blue side that can be flipped depending on what I'm wearing and what color feels right on that particular day.
You can easily make a quilted garment that fits close to your body by using cheap flannel fabric in place of quilt batting. Flannel fabric is easier to work with and trim down which makes the seams lie flatter. Flatter seams mean that with a little hand stitching, you can have a double sided jacket!
How to Create a Quilted Quilted Jacket
1. Pick a pattern you like - You're looking for patterns that pick heavy, thick fabrics because no matter how thin your batting or flannel, you're going to finish with a pretty thick garment. If you pick a garment that doesn't allow for this bulk, chances are it won't fit once it's finished. Most jackets and vest patterns, especially those that use fleece, allow for this bulk and are the best to use.
2. Test the fit - Trust me, the last thing you want to do is spend 10-20 hours quilting a garment that doesn't fit. Either hold the tissue up to your body and pin it or go the full 9 yards and make up a test piece with fleece or another thick cheap fabric. You will be very happy that you did!
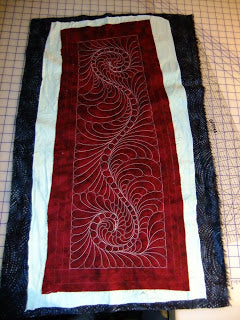
3. Mark the design on fabric - Don't cut out your fabric on the lines! Mark the pattern on the fabric first using a water soluble blue pen (light fabrics) or ceramic marking pencil (medium to dark fabrics). Also mark any registration lines and dots.
4. Cut out your fabric - Now cut out the fabric 2 inches away from the marks on all sides. You need the extra space in case you have shifting during the quilting process.
5. Decide on your design - For a simple design, use a quilting stencil to mark a design on your jacket using the same marking tools as you used to mark the pattern lines. For a more complex, personally made design, create a copy of your pattern on graph paper and play with designs using a light box.
6. Mark you designs - Mark your garmet on the back, fronts, and sleeves. Make sure to leave 5/8" open around all edges for your seam. Don't quilt right to the edges or the garment will be difficult to finish.
7. Cut out backing and batting - Using your already cut fabric pieces, cut out backing fabric and flannel or batting for the middle. From my experience, you'll want to pick a backing (inside fabric) that's close to the outside fabric unless you're very comfortable quilting in contrasting thread.
8. Sandwich and baste - Baste your garment just like a quilt, working from the center out and smoothing all wrinkles as you go.
9. Quilt your garment - Quilt the garment along the marked design lines. For stiffer garments like vests or stiff coats you can fill in the design very heavily with free motion filler designs.
For loser, more comfortable garments, only stitch the design lines and don't fill in the background area. Remember, don't quilt into the seam allowance!

10. Cut your pattern out - After you're completely done with the quilting process, lay the pattern back over your garment and cut each piece out along the lines for your size.
11. Piece your garment - Following the pattern directions, piece your garment just like normal, but instead of piecing through all 3 layers of the quilting, only seam together the outside fabric and flannel. Do not stitch through the backing fabric. Pin it out of your way so it doesn't get caught in any seams.
12. Finish Your Seams - Working with one seam at a time, press your seam open. Trim away the batting or fannel as close to the seam as possible without cutting through it. Cut the outside fabric seam allowance down to 1/4 inch.
Now unpin the backing fabric that you held aside during the piecing process. Take one side of the inside fabric and smooth it across the seam. You may need to trim this down a little to get it to lay down nicely. Now take the other side and fold it under 1/4 inch. Pin this over the seam and hand stitch it down to secure.
Special instructions for arm holes - Arm holes can be very tricky, no doubt about it. Finish and hand stitch ALL of your other seams (shoulder, side seams, and arm seam) before tackling your arm hole seams. Be very careful how much fabric you clip away, especially in the underarm area. When you do finish this seam, it should be the arm fabric that is folded on top and stitched down for the best finish.
13. Finish your hems - A very easy hem is the cut down your fabric to 1/2" less than the specifications of your pattern (so if your pattern calls for a 2 inch hem, cut off 1 1/2 inches of fabric). Cut the batting down an extra 1/2 inch. Fold under the inside and outside fabrics 1/2 inch, pin, then run a line of stitching 1/8 inch away from the edge to secure.
14. Bury and clip all threads and enjoy your new quilted garment!


